March 1, 2011

I'm a Struggler and I'll Never Give Up*


My husband attended a conference last week. As you might have deduced from last week's lack of blog post, things kind of fall apart around here when that happens. As I lay in bed exhausted each night, I thought to myself, "What would happen if I were a single mom? Or if I worked full time, and not just this measly part-time job?" My exhausted self answered, "Well, for one thing, you wouldn't be doing the blog. And you'd either be eating crap every night or have to find the wherewithal to become much more organized." Honestly, I don't know if I could do it, though I know people do do it. Maybe I'd rise to the occasion if I were forced to.

I want to be honest about such things, because nothing is more discouraging than reading someone's blog and imagining that their life is so much happier, healthier, more productive, etc. than your own. The sad truth is that we live in a society that doesn't value happiness, healthiness, or productivity (real productivity) very much, and so if we want these things in our lives, it's a struggle. I will leave it for you to come to your own conclusions about why this is the case.

That said, I truly enjoy cooking, and it makes me happy to feed my family. So I will keep on struggling. Here's an easy recipe for a coconut-cashew sauce I concocted last week. (This sauce was wonderful, but the rest of the week was something of a bust, foodwise.) I served it on Asian rice noodles, and threw some cilantro, and assorted lightly steamed/raw vegetables on top. I also threw some tofu under the broiler for about 15 minutes, and had that with the sauce as well. The sauce is pure white, which along with the white rice noodles, creates a snowy background against which your brightly colored vegetables can shine. Appropriate for the month of March, I think. (At least if you live further north than I do.)


I didn't take any pictures. Sorry. Photography also fell by the wayside last week. Instead I included pictures of the Brussels sprouts and Brussels sprouts greens I rescued (with permission!) from an abandoned plot at my community garden last week. I felt sorry the plot's owner hadn't been able to keep it going. But I totally understood.

Snowy White Coconut Cashew Sauce
1½ cups raw cashews
1 can coconut milk
2 cloves garlic, roughly chopped
½-inch piece of ginger, roughly chopped
1 teaspoon salt
1 teaspoon dark sesame oil

Puree all ingredients except for salt and sesame oil in a blender until smooth. Pour into a bowl and stir in salt and sesame oil. Serve with cooked rice noodles, steamed/raw vegetables, and broiled tofu. Add a dash of soy sauce if you wish, and a squeeze of Sri Racha if you like it spicy.

*Did you catch the song reference in the post title? Check out the great Barrington Levy.


February 15, 2011

Mixed-Vegetable Curry, American-Style


This week I thought I'd let you all in on a little secret – the secret of instant vegetable curry. My in-laws all make this curry, and sometimes I do too, when I need to get food on the table quickly and with minimal effort. It's better tasting, healthier, and much cheaper than takeout. The secret? A bag of frozen mixed vegetables. No chopping required! You see, I understand. Sometimes you don't have any fresh vegetables in the house. Or you just don't have time to chop, sad as that is. Or maybe you're just afraid of what you might do if you were to find yourself holding a knife in your hand. No need to tempt fate. Simply stock a couple bags of mixed frozen vegetables in your freezer, and you're good to go in these types of situations.

I should mention that this curry is most definitely an Indian-American concoction, as for the most part frozen vegetables don't exist in India. This is because most people in India don't have refrigerators. Those who do have refrigerators often don't have a freezer, or if they do, the freezer is about the size of a glove compartment. At any rate, with black-outs being a common and regular occurrence across much of the country, I'm not sure you'd want to trust your fridge or freezer for saving much of anything for very long.

You might wonder, how do people live without a fridge? Well, the answer is simple. Dry goods like rice and lentils need no refrigeration. Milk comes every day and is boiled, and used in coffee or tea, or made into yogurt. You go to the market every day or so and get what vegetables you need, and prepare the exact amount to be eaten, so that there are no leftovers. That way, nothing spoils. If you do this enough, you get very, very good at estimating how much food to prepare. Also, if you are Indian, wasting food is something you just do. Not. Do. Period. This cultural imperative is a strong motivator. (America is diametrically opposed to this ethic: Here, wasting is something you just do do.)

I think having a refrigerator may actually contribute to food wasting, because of our tendency to put leftovers in a container which over the course of a week gets shuffled to the back of the fridge and then forgotten about until a month or so later, when we finally get around to throwing out everything that's gone bad. So, kill your refrigerator! They use too much electricity anyway.


I'm assuming you didn't listen to me and you still have your refrigerator/freezer. So you can stockpile a few bags of frozen vegetables and make this curry when you need something fast. I guess that's just how life is in America sometimes.

This recipe follows my formula for Universal Curry, which I wrote about back in April of last year. As I wrote back then, you can sub in any number of vegetables, and get tasty results.

Mixed Vegetable Curry
2 teaspoons brown mustard seeds
1 tablespoon urad dal (black gram)*
1/4 teaspoon asafoetida powder*
1/2 teaspoon turmeric (optional)
2 pounds frozen mixed vegetables
salt
4 tablespoons dried, flaked coconut (unsweetened)
cayenne pepper to taste**
wedges of lemon or lime (optional)

Heat oil on medium high heat, along with mustard seeds and urad dal, in a large skillet or saute pan. When the urad dal is light brown and the mustard seeds begin to sputter and pop and turn grey, lower the heat and add the asafoetida and turmeric (if using). Mix quickly with mustard seeds and urad dal, then quickly add the mixed vegetables and stir to distribute oil and seasoning. Add salt. Cook uncovered on medium heat until the vegetables reach the desired tenderness. Make sure to stir and scrape the bottom of the pan occasionally to avoid sticking. Add the coconut and cook for a couple minutes more. Add more salt to taste if needed. Separate the portion of vegetables you will feed your children, then add desired amount of chili powder to the vegetables remaining in the pan and cook a minute longer. Serve with wedges of lemon or lime. This is optional, but sometimes a little zing of lemon or lime juice helps to brighten the flavors. This dish goes well with dal or sambar, and rice. It also would be nice with chapathis, or pongal, for something simple.

(You can try adding other spices depending on the vegetable. For carrots, I usually add some powdered cumin and coriander as I add the asafoetida. Also consider leaving out the coconut depending on the vegetable. For example, coconut works well with carrots, but I don't like it with eggplant as much.)

* Just get yourself on over to an Indian grocery (or DeKalb Farmer’s Market if near Decatur) and buy some urad dal and some asafoetida. Then you can make this any time you want with all those vegetables you get from your CSA that you don’t know how to use. (Turnip curry, anyone?)

**If you are cooking for people who don’t mind a bit of spiciness, you may add the cayenne powder at the same time as you add the asafoetida.


February 8, 2011

My Latest Pet: Umeboshi Vinegar (on Roasted Cabbage)

I am the first one to admit I have a problem. A condiment problem, that is. A problem that is only exacerbated by the fact that I live just a few miles away from Dekalb Farmer's Market, which is not really a farmer's market but is actually a giant warehouse filled with foods from around the world, in which at least a quarter of the merchandise appears to be condiments.

My latest discovery is umeboshi vinegar. Small, sour, Japanese plums (ume) are salted with red shiso leaves.  This produces a savory, salty, sour, fruity, red-colored juice, which is not truly a vinegar, but is darn tasty on just about everything. The salted, shiso-seasoned plums are dried, and are then called umeboshi. One use for umeboshi is as the filling inside of onigiri, which are rice balls wrapped in nori (seaweed). So guess what's next on my shopping list? Yes, the actual umeboshi. I'm hoping my kids will love onigiri, since they love sushi. I'm thinking the onigiri are going to go in their lunchboxes, since they've been complaining so much about being tired of sandwiches. "Tired of sandwiches? OK, how about a dried plum inside a rice ball, wrapped inside a sheet of seaweed? Mwa ha ha." (Meanwhile, some kid in Japan is telling his mother how sick he is of rice balls.) But anyway, that's a project for another week.

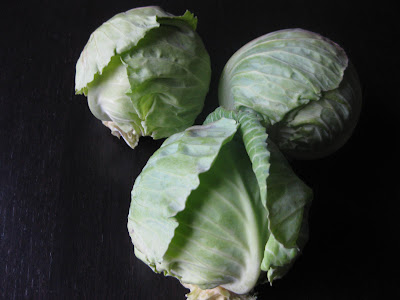
Back to this week, and the umeboshi vinegar. I had three very small cabbages which I cut into wedges and roasted with sliced onions. Roasting works wonders on cabbage just like it does with brussels sprouts, cauliflower, and broccoli. The cabbage becomes sweet and smoky. It's great on its own, but add a few splashes of umeboshi vinegar, and well... You've taken it to the next level.

The really great thing about umeboshi vinegar is that is doesn't have that same acidic bite of other vinegars. While still sour, it's much more mellow and subtle. It really doesn't overwhelm the food at all. So, what can I say? I'm not going into rehab anytime soon.


Roasted Cabbage and Onions with Umeboshi Vinegar
3 baby cabbages, or one medium cabbage, sliced into inch-thick wedges
1 small onion, sliced
a few glugs of olive oil
salt
pepper
umeboshi vinegar (to splash on individual servings)

Preheat the oven to 375°. Place the cabbage wedges and sliced onions on a large rimmed baking sheet, and pour a few glugs of olive oil on top. Mix the oil with the cabbage and onions with your hands, then make sure the vegetables are evenly spaced on the baking sheet. Sprinkle salt and pepper on top, and place in the oven for approximately 30 minutes, or until the cabbage is soft and browned on the edges. Pass the umeboshi vinegar at the table, to splash liberally on each serving.

February 1, 2011

Pongal: The Original Indian Food


Sometimes, pongal is all we need.  Rice and lentils, minimally gussied up with ghee, black pepper, cumin, and curry leaves (if you've got them). My husband's uncle calls pongal the original Indian food, as it predates the introduction of chili peppers to India by way of Christopher Columbus. Black pepper is the original Indian spice, and the original "black gold." (Cue Beverly Hillbillies music now and start saying "cee-ment pond.")  Much like today's black gold, wars were fought over it, and people were colonized over it. Now, of course, we can go into any fast food joint and get a little white packet of pepper for free, and then throw it away without ever using it. Crazy, huh? (Oh yeah, unless you're my husband – he saves the little pepper packets. And the salt and ketchup too. One of the reasons I love him so much.)


The version of pongal you're about to receive is my version. I like my cumin and black pepper to be ground up, though many people simply add whole cumin seeds and peppercorns. Curry leaves add a flavor I can only describe as herbal, citrusy nuttiness, and will take your pongal from just "awesome" to "blissfully awesome," but if you don't have them, don't sweat it. Your pongal will be good.

However, if you really want curry leaves, the Indian store is your best bet. Unfortunately, the Indian stores don't always have them, so if you do see them, grab a bunch. You can keep the extras in your freezer for months. Your other option is to find a good friend, most likely South Indian, who will fly to Boston and nab a few shoots off her mother's curry leaf plant, put them in a dirt-filled yogurt container, and carry them back on the airplane for you. As you can see below, the half of the plant that did not get smooshed is sprouting new growth! I had to cut the smooshed half, and ended up using the curry leaves in my pongal.


Just don't leave out the ghee (Indian clarified butter). That is simply not an option. If you don't have ghee, you can make some (the cheapest option and the topic of my very first post), you can buy some for a lot of money at Whole Foods or your local natural foods store, or you can buy some for much less money at the Indian grocery. I like to describe ghee's flavor as buttery, sweet nuttiness. Gotta love the nuttiness!

My last instruction: While you're eating, enjoy the camaraderie of the millions upon billions of Indians who've consumed pongal on a regular, perhaps even daily, basis for thousands of years. Quite the dinner party.

Ven Pongal (Savory Pongal)
2 ½ cups cooked brown rice
1 ½ cups cooked moong dal (other lentils that break down when cooked would be OK)
salt
4 tablespoons ghee, divided
about a dozen small curry leaves, or six large ones
1 scant tablespoon ground cumin
½ teaspoon freshly ground black pepper

In a large bowl mix together the rice and dal, adding salt to taste. Add a little water if the mixture is too dry and stiff to mix. In a small saucepan on medium high heat, melt two tablespoons of the ghee, then add the curry leaves and fry them until they begin to give off their fragrance. Take the saucepan off the heat and add the cumin and pepper, and let it sizzle for five or six seconds. Then quickly pour the contents of the saucepan onto the rice and lentils and mix everything together, along with two additional tablespoons of ghee. Add more salt if needed. This serves a family of four, meaning two kids and two adults. If you're really hungry or are serving all grown-ups, I'd double the recipe. Leftovers keep well and taste even better the next day. 

January 26, 2011

Still Cooking, Through Thick or Thin


Sometimes I don't know how I ever got the idea that I could cook. In my cooking life, I've failed in ways that would discourage the best of us. For example, there's the time back in the day (when Clinton was still president) when I decided it would be a good idea to invite the-man-who-would-become-my-husband over to dinner at my apartment, and show off what a great cook I was. For as George Meredith said, "Kissing don't last: cookery do." I suppose two weeks into a relationship is a little premature to start relying on cookery, but I'm a girl who likes to hedge her bets.

Being greeted at the door by a billowing cloud of smoke and a disheveled woman who quickly yanks you inside in order to avoid triggering the building fire alarm could not have appeared promising. Yet for some reason my future husband stuck with me and I stuck with cooking.

I guess in the end, love and determination (translation: co-dependency and sheer, unrelenting obstinacy) are what gets us through.

Recently I decided to cook a fancy wedding anniversary dinner for my husband and myself. I won't say much about it; let's just say that the gnocchi alla romana didn't gnocchize. Failure. Stupid, annoying failure. Please note the theme I am developing here: Show-offs never prosper. Luckily, my husband bought us a bottle of something nice.

He's obviously a man who has learned to hedge his bets as well.

The next day, I was back to feeling annoyed about the gnocchi. I decided to make something fabulous and decadent so those gnocchi would know who's boss. Something with lots of mushrooms and cream, and a huge punch of lemon to blast through all that heaviness, both metaphorical and real. Something that would be good with pasta. Forget the gnocchi, who needs 'em? Not me.

In case you need proof that this sauce is very likable, my four-year-old daughter happily ate it. Not on her pasta, of course. But on the side. She even ate the oyster mushrooms without question. They have a mild flavor, somewhat reminiscent of seafood. Lemon works well with them. (You should eat them too. They're good for you!) Be aware that the amount of lemon I've recommended is quite assertive. I think it cuts through the heaviness of the cream quite nicely, but you could probably reduce the amount of lemon juice by half and be OK.


Oyster Mushroom Lemon Cream Sauce
2 tablespoons butter
1 medium onion, sliced in 1/2 inch pieces "against the grain"
4 cloves garlic, minced
half a pound crimini mushrooms, sliced
half a pound oyster mushrooms, cut into 1- or 2-inch pieces
1/2 teaspoon fresh rosemary, minced
1/2 teaspoon lemon zest
juice of one lemon
3/4 cup cream
1/3 cup grated Parmigiano Reggiano (the good stuff)
salt

Melt the butter in a large saute pan over medium heat. Add the onions and saute them for 6-7 minutes, until softened. Add the garlic and saute about one more minute. Add the mushrooms and a few pinches of salt, and continue to saute until the mushrooms have softened and released their juices. Add the lemon zest and rosemary and saute a couple minutes more. Reduce heat to very low and add the lemon juice and cream and stir to combine. Heat but be very careful not to boil. Stir in the Parmigiano. Add more salt if needed. Serve tossed with pasta, with additional Parmigiano sprinkled on top. Farfalle (bowties) work well.


January 19, 2011

Orange Cardamom Cake to Melt the Ice

In case you didn't know, last week we were held prisoner by ice for five days. Five days of no school, no work, no driving. What did we do? Go sledding. What else? Go crazy. And what else? Make cake. Oh yes, and eat cake. It's safe to say I won't need a piece of cake for at least three months. OK, maybe one little slice more.


The cake binge started with an argument between my children over the possession of three small white marbles. It was day four of the ice prison and apparently when you've been stuck at home for four days straight three small white marbles become very important and one must have all three of them and one can not share them at any cost, because then one would not have all three marbles, would one?

I knew at that point actual logic was useless, so I used the logic of sweet baked goods. "Who wants to help me make a cake?" Argument over. Thank God.


Over the next few days we made a total of three cakes, one of which we used for my husband's birthday cake. For his birthday dinner, we made his favorite: masala dosai with coconut chutney. (The masala is potato curry filling folded inside the dosa. A dosa is a rice and lentil crepe.) I wanted a cake that would work well with Indian food, and I had the cardamom from the previous week's banana recipe fresh in my mind. So I came up with this: caramel cardamom mandarin orange upside down cake. I used the caramel version of the Hurry-Up Cake from my trusty 1964 "Joy of Cooking" as a reference point, but the cardamom and the mandarin orange "topping" were all me. (You know how upside down cake works, right? You put the topping in the bottom of the cake pan, then the cake batter, and bake. When the cake is done you flip the cake upside down onto the plate, and what was on the bottom is now on top. All the butter and sugar and fruit has caramelized and become sticky with all sorts of goodness.)

So let me just talk for a moment about what sends this cake over the top: the use of orange blossom water in the topping. Without it, the sticky goodness is still really good. But with just a half teaspoon of this magic elixir, it becomes ambrosial. Like the balmy air of an orange grove in winter, like the bees are buzzing around you. I am one of those people who happens to have a bottle of orange blossom water lying around, because I'm just like that. I know most people aren't like me, but I urge you to go to your nearest Middle Eastern market (or DeKalb Farmer's Market, if you are lucky like me and live close to that place) and pick up a bottle. You'll start thinking of other uses for it, I promise. Like adding it to honey, or smoothies, or homemade sorbet, or whatever. Or else you can just make this cake hundreds of times. It was the sun in cake form for us.


Caramel Mandarin Orange Upside Down Cake
Based on a recipe from Irma Rombauer's 1964 edition of "The Joy of Cooking"
For the topping:
½ cup unsalted butter
¾ cup brown sugar, packed
½ teaspoon orange blossom water
2 11-ounce cans of mandarin oranges in light syrup

Grease a ten-inch cake pan. (Don't use a pan with removable sides: It will leak hot sugary butter all over your oven, and smoke you out of your home. Yes, I learned this the hard way.) Melt the butter in a small saucepan on medium heat, then add the brown sugar and stir for a few minutes until the brown sugar is completely combined and melted. Remove the pan from the heat, and add the orange blossom water. Set aside.

Drain the mandarin oranges of their liquid and, starting in the center, arrange the orange slices in a circular pattern on the bottom of the cake pan. Pour the butter/brown sugar mixture over the orange slices and gently spread it evenly over the bottom of the pan, taking care not to disturb the orange slices.

For the cake batter:
1¾ cups all-purpose unbleached white flour
1 cup brown sugar, packed
1 teaspoon ground cardamom
½ cup soft butter
2 eggs
½ cup milk
½ teaspoon salt
1¾ teaspoons double-acting baking powder
1 teaspoon vanilla

Preheat the oven to 350 degrees. In a large bowl mix together the flour, brown sugar, and cardamom. Then add the butter, eggs, milk, salt, baking powder, and vanilla, and mix thoroughly. Pour the batter over the orange slices, and gently spread it evenly over the entire cake pan. Bake in the middle of the oven for 45 minutes or until the cake is done in the center. Let the cake cool for a few minutes, then with a table knife loosen the sides from the pan if necessary. Then place a plate under the bottom of the cake pan. Place another plate on top of the cake pan. Carefully flip the cake upside down while holding it between the two plates. Lift the plate that is now on top off the cake. Then lift up the upside down cake pan. The pan should slide off easily, and the oranges should now be on top of the cake. Serve with vanilla ice cream.

January 11, 2011

Back in the Saddle


I finally found my groove again. In case you couldn't tell, I've been kind of cranky and under the weather recently. The holidays do this to me every year. But this past couple of weeks I've been on an Indian food kick, which started at my in-laws in Raleigh, when we made a wreath of 108 vadai (deep fried lentil cakes, shaped like doughnuts), wrapped it in foil, and brought it to the temple for Hanuman.


Making food for God reminded me that every time I make food, I am making it for God. I really needed that.

Later on my sister-in-law showed us how to make stuffed parathas with leftover potato curry. A paratha is basically a chapati fried in a bit of oil. And a chapati, if you don't know, is basically the Indian tortilla. My daughters learned the process of rolling out and stuffing the parathas amazingly quickly, and I rejoiced at the thought that someday in the not-too-distant-future they would be able to make me dinner. What a glorious day that will be! (I like making food for God, but I'm more than OK with others doing it too.)


Back at home I went on a North Indian spree and made channa masala (chickpea curry) with chapatis. I then followed that up with a riff on sag paneer made with collard greens instead of spinach. Sag paneer is basically a spiced creamed spinach with cubes of fried paneer (mild cheese). And more chapatis, which my older daughter rolled out entirely on her own! This saved me a ton of work and she loved every minute of it. Hooray for child labor!

I thought of passing on the recipe for collard greens paneer today, but then realized it would make more sense to just give my North Indian formula, so that not only could you make collard greens, but really anything North Indian. It's pretty easy, but requires more thought and experimentation on my part. Sorry to tease you like that. The collard green paneer will be worth coming back for though, I promise.


In the meantime, I wanted to share another recipe that totally knocked our socks off, based on a recipe from Yamuna Devi's Lord Krishna's Cuisine: The Art of Indian Vegetarian Cooking. But before I do, I just have to talk about this book. I've owned it for several years, and it has been worth every bit of the $40 I spent on it. Most of the time it sits on my bookshelf collecting dust, but every so often I am in need of inspiration, so I take it down, turn to a random page, and begin reading. And every single time I am inspired to keep on cooking. There are just so many good ideas and exciting flavor combinations in this book.

So, anyway, I made these bananas for dessert the other night. The sauce will force you to lick your plate clean, and then be quite despondent that you have not made a double batch. So I recommend you double the recipe. (Also, please don't be put off by this picture. The bananas really were delicious. Unfortunately, with winter my access to natural lighting is limited and the bananas were so good we ate them all and didn't save any for me to photograph in daylight the next day. And I don't have $173.95 to buy a Lowel Tota-Light. Nor do I necessarily want to, as it goes against the grain of my lo-fi ethic.)


Broiled Bananas with Citrus, Toasted Almonds, and Vanilla Yogurt
Based on a recipe from Yamuna Devi's Lord Krishna's Cuisine

Juice of one lime
Juice of one orange (large chunks of orange are OK, even desirable)
1/4 teaspoon cinnamon
1/4 teaspoon ground cardamom*
2 tablespoons melted ghee or butter (ghee is preferable)
4 firm bananas
1/4 cup brown sugar
2 tablespoons blanched slivered almonds
Vanilla yogurt (for spooning on top)

Preheat your oven's broiler. In a small container mix together the lime juice, orange juice, cinnamon, and cardamom. Lightly grease a small rimmed baking sheet with a little bit of the ghee. Slice the bananas in half lengthwise and place on the baking sheet cut side up. Pour the juice over the bananas, drizzle with the rest of the ghee, and sprinkle the brown sugar on top.

Place the baking sheet under the broiler, and broil for about 4 minutes, or until the bananas are a bit browned and bubbly. Sprinkle the almonds on top of the bananas and return to the broiler for a couple more minutes, until the almonds are golden brown. Serve with dollops of vanilla yogurt on top. (This makes an excellent dessert, but I think it would also be great on oatmeal or French toast for breakfast.)

*If you have a coffee grinder, I recommend grinding whole cardamom pods in it. Then grind your next batch of coffee beans without cleaning out the cardamom residue. Best coffee ever!

January 4, 2011

Sick Kid, Sick Me

My very cranky four-year-old has morphed into a sick four-year-old, and I have morphed into sick mom. So no post this week. But if you are looking for something good to read, here's a nice interview with "fermentation fetishist" Sandor Katz in one of my favorite magazines, The Sun.