I haven't updated this blog for quite some time. I'm no longer food blogging, but please make yourselves comfortable, and feel free to read and cook whatever you see here. Enjoy! And if you like what you read, come visit my site Flindermouse, where I post my poems. They won't feed your belly, but maybe some other part of you will get fed.
July 25, 2013


March 1, 2011
I'm a Struggler and I'll Never Give Up*

My husband attended a conference last week. As you might have deduced from last week's lack of blog post, things kind of fall apart around here when that happens. As I lay in bed exhausted each night, I thought to myself, "What would happen if I were a single mom? Or if I worked full time, and not just this measly part-time job?" My exhausted self answered, "Well, for one thing, you wouldn't be doing the blog. And you'd either be eating crap every night or have to find the wherewithal to become much more organized." Honestly, I don't know if I could do it, though I know people do do it. Maybe I'd rise to the occasion if I were forced to.
I want to be honest about such things, because nothing is more discouraging than reading someone's blog and imagining that their life is so much happier, healthier, more productive, etc. than your own. The sad truth is that we live in a society that doesn't value happiness, healthiness, or productivity (real productivity) very much, and so if we want these things in our lives, it's a struggle. I will leave it for you to come to your own conclusions about why this is the case.
That said, I truly enjoy cooking, and it makes me happy to feed my family. So I will keep on struggling. Here's an easy recipe for a coconut-cashew sauce I concocted last week. (This sauce was wonderful, but the rest of the week was something of a bust, foodwise.) I served it on Asian rice noodles, and threw some cilantro, and assorted lightly steamed/raw vegetables on top. I also threw some tofu under the broiler for about 15 minutes, and had that with the sauce as well. The sauce is pure white, which along with the white rice noodles, creates a snowy background against which your brightly colored vegetables can shine. Appropriate for the month of March, I think. (At least if you live further north than I do.)

I didn't take any pictures. Sorry. Photography also fell by the wayside last week. Instead I included pictures of the Brussels sprouts and Brussels sprouts greens I rescued (with permission!) from an abandoned plot at my community garden last week. I felt sorry the plot's owner hadn't been able to keep it going. But I totally understood.
Snowy White Coconut Cashew Sauce
1½ cups raw cashews
1 can coconut milk
2 cloves garlic, roughly chopped
½-inch piece of ginger, roughly chopped
1 teaspoon salt
1 teaspoon dark sesame oil
Puree all ingredients except for salt and sesame oil in a blender until smooth. Pour into a bowl and stir in salt and sesame oil. Serve with cooked rice noodles, steamed/raw vegetables, and broiled tofu. Add a dash of soy sauce if you wish, and a squeeze of Sri Racha if you like it spicy.
*Did you catch the song reference in the post title? Check out the great Barrington Levy.

1 can coconut milk
2 cloves garlic, roughly chopped
½-inch piece of ginger, roughly chopped
1 teaspoon salt
1 teaspoon dark sesame oil
Puree all ingredients except for salt and sesame oil in a blender until smooth. Pour into a bowl and stir in salt and sesame oil. Serve with cooked rice noodles, steamed/raw vegetables, and broiled tofu. Add a dash of soy sauce if you wish, and a squeeze of Sri Racha if you like it spicy.
*Did you catch the song reference in the post title? Check out the great Barrington Levy.

February 15, 2011
Mixed-Vegetable Curry, American-Style

This week I thought I'd let you all in on a little secret – the secret of instant vegetable curry. My in-laws all make this curry, and sometimes I do too, when I need to get food on the table quickly and with minimal effort. It's better tasting, healthier, and much cheaper than takeout. The secret? A bag of frozen mixed vegetables. No chopping required! You see, I understand. Sometimes you don't have any fresh vegetables in the house. Or you just don't have time to chop, sad as that is. Or maybe you're just afraid of what you might do if you were to find yourself holding a knife in your hand. No need to tempt fate. Simply stock a couple bags of mixed frozen vegetables in your freezer, and you're good to go in these types of situations.
I should mention that this curry is most definitely an Indian-American concoction, as for the most part frozen vegetables don't exist in India. This is because most people in India don't have refrigerators. Those who do have refrigerators often don't have a freezer, or if they do, the freezer is about the size of a glove compartment. At any rate, with black-outs being a common and regular occurrence across much of the country, I'm not sure you'd want to trust your fridge or freezer for saving much of anything for very long.
You might wonder, how do people live without a fridge? Well, the answer is simple. Dry goods like rice and lentils need no refrigeration. Milk comes every day and is boiled, and used in coffee or tea, or made into yogurt. You go to the market every day or so and get what vegetables you need, and prepare the exact amount to be eaten, so that there are no leftovers. That way, nothing spoils. If you do this enough, you get very, very good at estimating how much food to prepare. Also, if you are Indian, wasting food is something you just do. Not. Do. Period. This cultural imperative is a strong motivator. (America is diametrically opposed to this ethic: Here, wasting is something you just do do.)
I think having a refrigerator may actually contribute to food wasting, because of our tendency to put leftovers in a container which over the course of a week gets shuffled to the back of the fridge and then forgotten about until a month or so later, when we finally get around to throwing out everything that's gone bad. So, kill your refrigerator! They use too much electricity anyway.

I'm assuming you didn't listen to me and you still have your refrigerator/freezer. So you can stockpile a few bags of frozen vegetables and make this curry when you need something fast. I guess that's just how life is in America sometimes.
This recipe follows my formula for Universal Curry, which I wrote about back in April of last year. As I wrote back then, you can sub in any number of vegetables, and get tasty results.
Mixed Vegetable Curry
2 teaspoons brown mustard seeds
1 tablespoon urad dal (black gram)*
1/4 teaspoon asafoetida powder*
1/2 teaspoon turmeric (optional)
2 pounds frozen mixed vegetables
salt
4 tablespoons dried, flaked coconut (unsweetened)
cayenne pepper to taste**
wedges of lemon or lime (optional)
Heat oil on medium high heat, along with mustard seeds and urad dal, in a large skillet or saute pan. When the urad dal is light brown and the mustard seeds begin to sputter and pop and turn grey, lower the heat and add the asafoetida and turmeric (if using). Mix quickly with mustard seeds and urad dal, then quickly add the mixed vegetables and stir to distribute oil and seasoning. Add salt. Cook uncovered on medium heat until the vegetables reach the desired tenderness. Make sure to stir and scrape the bottom of the pan occasionally to avoid sticking. Add the coconut and cook for a couple minutes more. Add more salt to taste if needed. Separate the portion of vegetables you will feed your children, then add desired amount of chili powder to the vegetables remaining in the pan and cook a minute longer. Serve with wedges of lemon or lime. This is optional, but sometimes a little zing of lemon or lime juice helps to brighten the flavors. This dish goes well with dal or sambar, and rice. It also would be nice with chapathis, or pongal, for something simple.
(You can try adding other spices depending on the vegetable. For carrots, I usually add some powdered cumin and coriander as I add the asafoetida. Also consider leaving out the coconut depending on the vegetable. For example, coconut works well with carrots, but I don't like it with eggplant as much.)
* Just get yourself on over to an Indian grocery (or DeKalb Farmer’s Market if near
**If you are cooking for people who don’t mind a bit of spiciness, you may add the cayenne powder at the same time as you add the asafoetida.

February 8, 2011
My Latest Pet: Umeboshi Vinegar (on Roasted Cabbage)
I am the first one to admit I have a problem. A condiment problem, that is. A problem that is only exacerbated by the fact that I live just a few miles away from Dekalb Farmer's Market, which is not really a farmer's market but is actually a giant warehouse filled with foods from around the world, in which at least a quarter of the merchandise appears to be condiments.
 My latest discovery is umeboshi vinegar. Small, sour, Japanese plums (ume) are salted with red shiso leaves. This produces a savory, salty, sour, fruity, red-colored juice, which is not truly a vinegar, but is darn tasty on just about everything. The salted, shiso-seasoned plums are dried, and are then called umeboshi. One use for umeboshi is as the filling inside of onigiri, which are rice balls wrapped in nori (seaweed). So guess what's next on my shopping list? Yes, the actual umeboshi. I'm hoping my kids will love onigiri, since they love sushi. I'm thinking the onigiri are going to go in their lunchboxes, since they've been complaining so much about being tired of sandwiches. "Tired of sandwiches? OK, how about a dried plum inside a rice ball, wrapped inside a sheet of seaweed? Mwa ha ha." (Meanwhile, some kid in Japan is telling his mother how sick he is of rice balls.) But anyway, that's a project for another week.
Back to this week, and the umeboshi vinegar. I had three very small cabbages which I cut into wedges and roasted with sliced onions. Roasting works wonders on cabbage just like it does with brussels sprouts, cauliflower, and broccoli. The cabbage becomes sweet and smoky. It's great on its own, but add a few splashes of umeboshi vinegar, and well... You've taken it to the next level.
The really great thing about umeboshi vinegar is that is doesn't have that same acidic bite of other vinegars. While still sour, it's much more mellow and subtle. It really doesn't overwhelm the food at all. So, what can I say? I'm not going into rehab anytime soon.
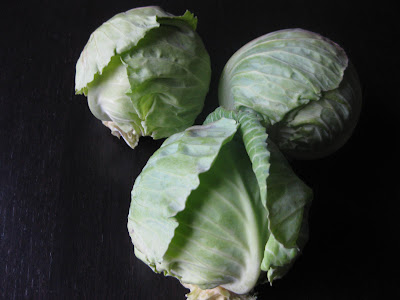
Roasted Cabbage and Onions with Umeboshi Vinegar
3 baby cabbages, or one medium cabbage, sliced into inch-thick wedges
1 small onion, sliced
a few glugs of olive oil
salt
pepper
umeboshi vinegar (to splash on individual servings)
Preheat the oven to 375°. Place the cabbage wedges and sliced onions on a large rimmed baking sheet, and pour a few glugs of olive oil on top. Mix the oil with the cabbage and onions with your hands, then make sure the vegetables are evenly spaced on the baking sheet. Sprinkle salt and pepper on top, and place in the oven for approximately 30 minutes, or until the cabbage is soft and browned on the edges. Pass the umeboshi vinegar at the table, to splash liberally on each serving.


Back to this week, and the umeboshi vinegar. I had three very small cabbages which I cut into wedges and roasted with sliced onions. Roasting works wonders on cabbage just like it does with brussels sprouts, cauliflower, and broccoli. The cabbage becomes sweet and smoky. It's great on its own, but add a few splashes of umeboshi vinegar, and well... You've taken it to the next level.
The really great thing about umeboshi vinegar is that is doesn't have that same acidic bite of other vinegars. While still sour, it's much more mellow and subtle. It really doesn't overwhelm the food at all. So, what can I say? I'm not going into rehab anytime soon.

Roasted Cabbage and Onions with Umeboshi Vinegar
3 baby cabbages, or one medium cabbage, sliced into inch-thick wedges
1 small onion, sliced
a few glugs of olive oil
salt
pepper
umeboshi vinegar (to splash on individual servings)
Preheat the oven to 375°. Place the cabbage wedges and sliced onions on a large rimmed baking sheet, and pour a few glugs of olive oil on top. Mix the oil with the cabbage and onions with your hands, then make sure the vegetables are evenly spaced on the baking sheet. Sprinkle salt and pepper on top, and place in the oven for approximately 30 minutes, or until the cabbage is soft and browned on the edges. Pass the umeboshi vinegar at the table, to splash liberally on each serving.

February 1, 2011
Pongal: The Original Indian Food

Sometimes, pongal is all we need. Rice and lentils, minimally gussied up with ghee, black pepper, cumin, and curry leaves (if you've got them). My husband's uncle calls pongal the original Indian food, as it predates the introduction of chili peppers to India by way of Christopher Columbus. Black pepper is the original Indian spice, and the original "black gold." (Cue Beverly Hillbillies music now and start saying "cee-ment pond.") Much like today's black gold, wars were fought over it, and people were colonized over it. Now, of course, we can go into any fast food joint and get a little white packet of pepper for free, and then throw it away without ever using it. Crazy, huh? (Oh yeah, unless you're my husband – he saves the little pepper packets. And the salt and ketchup too. One of the reasons I love him so much.)

The version of pongal you're about to receive is my version. I like my cumin and black pepper to be ground up, though many people simply add whole cumin seeds and peppercorns. Curry leaves add a flavor I can only describe as herbal, citrusy nuttiness, and will take your pongal from just "awesome" to "blissfully awesome," but if you don't have them, don't sweat it. Your pongal will be good.
However, if you really want curry leaves, the Indian store is your best bet. Unfortunately, the Indian stores don't always have them, so if you do see them, grab a bunch. You can keep the extras in your freezer for months. Your other option is to find a good friend, most likely South Indian, who will fly to Boston and nab a few shoots off her mother's curry leaf plant, put them in a dirt-filled yogurt container, and carry them back on the airplane for you. As you can see below, the half of the plant that did not get smooshed is sprouting new growth! I had to cut the smooshed half, and ended up using the curry leaves in my pongal.

Just don't leave out the ghee (Indian clarified butter). That is simply not an option. If you don't have ghee, you can make some (the cheapest option and the topic of my very first post), you can buy some for a lot of money at Whole Foods or your local natural foods store, or you can buy some for much less money at the Indian grocery. I like to describe ghee's flavor as buttery, sweet nuttiness. Gotta love the nuttiness!
My last instruction: While you're eating, enjoy the camaraderie of the millions upon billions of Indians who've consumed pongal on a regular, perhaps even daily, basis for thousands of years. Quite the dinner party.
Ven Pongal (Savory Pongal)
2 ½ cups cooked brown rice
1 ½ cups cooked moong dal (other lentils that break down when cooked would be OK)
salt
4 tablespoons ghee, divided
about a dozen small curry leaves, or six large ones
1 scant tablespoon ground cumin
½ teaspoon freshly ground black pepper
In a large bowl mix together the rice and dal, adding salt to taste. Add a little water if the mixture is too dry and stiff to mix. In a small saucepan on medium high heat, melt two tablespoons of the ghee, then add the curry leaves and fry them until they begin to give off their fragrance. Take the saucepan off the heat and add the cumin and pepper, and let it sizzle for five or six seconds. Then quickly pour the contents of the saucepan onto the rice and lentils and mix everything together, along with two additional tablespoons of ghee. Add more salt if needed. This serves a family of four, meaning two kids and two adults. If you're really hungry or are serving all grown-ups, I'd double the recipe. Leftovers keep well and taste even better the next day.
January 26, 2011
Still Cooking, Through Thick or Thin

Sometimes I don't know how I ever got the idea that I could cook. In my cooking life, I've failed in ways that would discourage the best of us. For example, there's the time back in the day (when Clinton was still president) when I decided it would be a good idea to invite the-man-who-would-become-my-husband over to dinner at my apartment, and show off what a great cook I was. For as George Meredith said, "Kissing don't last: cookery do." I suppose two weeks into a relationship is a little premature to start relying on cookery, but I'm a girl who likes to hedge her bets.
Being greeted at the door by a billowing cloud of smoke and a disheveled woman who quickly yanks you inside in order to avoid triggering the building fire alarm could not have appeared promising. Yet for some reason my future husband stuck with me and I stuck with cooking.
I guess in the end, love and determination (translation: co-dependency and sheer, unrelenting obstinacy) are what gets us through.

He's obviously a man who has learned to hedge his bets as well.
The next day, I was back to feeling annoyed about the gnocchi. I decided to make something fabulous and decadent so those gnocchi would know who's boss. Something with lots of mushrooms and cream, and a huge punch of lemon to blast through all that heaviness, both metaphorical and real. Something that would be good with pasta. Forget the gnocchi, who needs 'em? Not me.
In case you need proof that this sauce is very likable, my four-year-old daughter happily ate it. Not on her pasta, of course. But on the side. She even ate the oyster mushrooms without question. They have a mild flavor, somewhat reminiscent of seafood. Lemon works well with them. (You should eat them too. They're good for you!) Be aware that the amount of lemon I've recommended is quite assertive. I think it cuts through the heaviness of the cream quite nicely, but you could probably reduce the amount of lemon juice by half and be OK.

Oyster Mushroom Lemon Cream Sauce
2 tablespoons butter
1 medium onion, sliced in 1/2 inch pieces "against the grain"
4 cloves garlic, minced
half a pound crimini mushrooms, sliced
half a pound oyster mushrooms, cut into 1- or 2-inch pieces
1/2 teaspoon fresh rosemary, minced
1/2 teaspoon lemon zest
juice of one lemon
3/4 cup cream
1/3 cup grated Parmigiano Reggiano (the good stuff)
salt
Melt the butter in a large saute pan over medium heat. Add the onions and saute them for 6-7 minutes, until softened. Add the garlic and saute about one more minute. Add the mushrooms and a few pinches of salt, and continue to saute until the mushrooms have softened and released their juices. Add the lemon zest and rosemary and saute a couple minutes more. Reduce heat to very low and add the lemon juice and cream and stir to combine. Heat but be very careful not to boil. Stir in the Parmigiano. Add more salt if needed. Serve tossed with pasta, with additional Parmigiano sprinkled on top. Farfalle (bowties) work well.

January 19, 2011
Orange Cardamom Cake to Melt the Ice
In case you didn't know, last week we were held prisoner by ice for five days. Five days of no school, no work, no driving. What did we do? Go sledding. What else? Go crazy. And what else? Make cake. Oh yes, and eat cake. It's safe to say I won't need a piece of cake for at least three months. OK, maybe one little slice more.

The cake binge started with an argument between my children over the possession of three small white marbles. It was day four of the ice prison and apparently when you've been stuck at home for four days straight three small white marbles become very important and one must have all three of them and one can not share them at any cost, because then one would not have all three marbles, would one?


The cake binge started with an argument between my children over the possession of three small white marbles. It was day four of the ice prison and apparently when you've been stuck at home for four days straight three small white marbles become very important and one must have all three of them and one can not share them at any cost, because then one would not have all three marbles, would one?
I knew at that point actual logic was useless, so I used the logic of sweet baked goods. "Who wants to help me make a cake?" Argument over. Thank God.

Over the next few days we made a total of three cakes, one of which we used for my husband's birthday cake. For his birthday dinner, we made his favorite: masala dosai with coconut chutney. (The masala is potato curry filling folded inside the dosa. A dosa is a rice and lentil crepe.) I wanted a cake that would work well with Indian food, and I had the cardamom from the previous week's banana recipe fresh in my mind. So I came up with this: caramel cardamom mandarin orange upside down cake. I used the caramel version of the Hurry-Up Cake from my trusty 1964 "Joy of Cooking" as a reference point, but the cardamom and the mandarin orange "topping" were all me. (You know how upside down cake works, right? You put the topping in the bottom of the cake pan, then the cake batter, and bake. When the cake is done you flip the cake upside down onto the plate, and what was on the bottom is now on top. All the butter and sugar and fruit has caramelized and become sticky with all sorts of goodness.)
So let me just talk for a moment about what sends this cake over the top: the use of orange blossom water in the topping. Without it, the sticky goodness is still really good. But with just a half teaspoon of this magic elixir, it becomes ambrosial. Like the balmy air of an orange grove in winter, like the bees are buzzing around you. I am one of those people who happens to have a bottle of orange blossom water lying around, because I'm just like that. I know most people aren't like me, but I urge you to go to your nearest Middle Eastern market (or DeKalb Farmer's Market, if you are lucky like me and live close to that place) and pick up a bottle. You'll start thinking of other uses for it, I promise. Like adding it to honey, or smoothies, or homemade sorbet, or whatever. Or else you can just make this cake hundreds of times. It was the sun in cake form for us.

Caramel Mandarin Orange Upside Down Cake
Based on a recipe from Irma Rombauer's 1964 edition of "The Joy of Cooking"
For the topping:
½ cup unsalted butter
¾ cup brown sugar, packed
½ teaspoon orange blossom water
2 11-ounce cans of mandarin oranges in light syrup
Grease a ten-inch cake pan. (Don't use a pan with removable sides: It will leak hot sugary butter all over your oven, and smoke you out of your home. Yes, I learned this the hard way.) Melt the butter in a small saucepan on medium heat, then add the brown sugar and stir for a few minutes until the brown sugar is completely combined and melted. Remove the pan from the heat, and add the orange blossom water. Set aside.
Drain the mandarin oranges of their liquid and, starting in the center, arrange the orange slices in a circular pattern on the bottom of the cake pan. Pour the butter/brown sugar mixture over the orange slices and gently spread it evenly over the bottom of the pan, taking care not to disturb the orange slices.
For the cake batter:
1¾ cups all-purpose unbleached white flour
1 cup brown sugar, packed
1 teaspoon ground cardamom
½ cup soft butter
2 eggs
½ cup milk
½ teaspoon salt
1¾ teaspoons double-acting baking powder
1 teaspoon vanilla
Preheat the oven to 350 degrees. In a large bowl mix together the flour, brown sugar, and cardamom. Then add the butter, eggs, milk, salt, baking powder, and vanilla, and mix thoroughly. Pour the batter over the orange slices, and gently spread it evenly over the entire cake pan. Bake in the middle of the oven for 45 minutes or until the cake is done in the center. Let the cake cool for a few minutes, then with a table knife loosen the sides from the pan if necessary. Then place a plate under the bottom of the cake pan. Place another plate on top of the cake pan. Carefully flip the cake upside down while holding it between the two plates. Lift the plate that is now on top off the cake. Then lift up the upside down cake pan. The pan should slide off easily, and the oranges should now be on top of the cake. Serve with vanilla ice cream.
January 11, 2011
Back in the Saddle

I finally found my groove again. In case you couldn't tell, I've been kind of cranky and under the weather recently. The holidays do this to me every year. But this past couple of weeks I've been on an Indian food kick, which started at my in-laws in Raleigh, when we made a wreath of 108 vadai (deep fried lentil cakes, shaped like doughnuts), wrapped it in foil, and brought it to the temple for Hanuman.

Making food for God reminded me that every time I make food, I am making it for God. I really needed that.
Later on my sister-in-law showed us how to make stuffed parathas with leftover potato curry. A paratha is basically a chapati fried in a bit of oil. And a chapati, if you don't know, is basically the Indian tortilla. My daughters learned the process of rolling out and stuffing the parathas amazingly quickly, and I rejoiced at the thought that someday in the not-too-distant-future they would be able to make me dinner. What a glorious day that will be! (I like making food for God, but I'm more than OK with others doing it too.)


In the meantime, I wanted to share another recipe that totally knocked our socks off, based on a recipe from Yamuna Devi's Lord Krishna's Cuisine: The Art of Indian Vegetarian Cooking. But before I do, I just have to talk about this book. I've owned it for several years, and it has been worth every bit of the $40 I spent on it. Most of the time it sits on my bookshelf collecting dust, but every so often I am in need of inspiration, so I take it down, turn to a random page, and begin reading. And every single time I am inspired to keep on cooking. There are just so many good ideas and exciting flavor combinations in this book.
Later on my sister-in-law showed us how to make stuffed parathas with leftover potato curry. A paratha is basically a chapati fried in a bit of oil. And a chapati, if you don't know, is basically the Indian tortilla. My daughters learned the process of rolling out and stuffing the parathas amazingly quickly, and I rejoiced at the thought that someday in the not-too-distant-future they would be able to make me dinner. What a glorious day that will be! (I like making food for God, but I'm more than OK with others doing it too.)

Back at home I went on a North Indian spree and made channa masala (chickpea curry) with chapatis. I then followed that up with a riff on sag paneer made with collard greens instead of spinach. Sag paneer is basically a spiced creamed spinach with cubes of fried paneer (mild cheese). And more chapatis, which my older daughter rolled out entirely on her own! This saved me a ton of work and she loved every minute of it. Hooray for child labor!
I thought of passing on the recipe for collard greens paneer today, but then realized it would make more sense to just give my North Indian formula, so that not only could you make collard greens, but really anything North Indian. It's pretty easy, but requires more thought and experimentation on my part. Sorry to tease you like that. The collard green paneer will be worth coming back for though, I promise.

In the meantime, I wanted to share another recipe that totally knocked our socks off, based on a recipe from Yamuna Devi's Lord Krishna's Cuisine: The Art of Indian Vegetarian Cooking. But before I do, I just have to talk about this book. I've owned it for several years, and it has been worth every bit of the $40 I spent on it. Most of the time it sits on my bookshelf collecting dust, but every so often I am in need of inspiration, so I take it down, turn to a random page, and begin reading. And every single time I am inspired to keep on cooking. There are just so many good ideas and exciting flavor combinations in this book.
So, anyway, I made these bananas for dessert the other night. The sauce will force you to lick your plate clean, and then be quite despondent that you have not made a double batch. So I recommend you double the recipe. (Also, please don't be put off by this picture. The bananas really were delicious. Unfortunately, with winter my access to natural lighting is limited and the bananas were so good we ate them all and didn't save any for me to photograph in daylight the next day. And I don't have $173.95 to buy a Lowel Tota-Light. Nor do I necessarily want to, as it goes against the grain of my lo-fi ethic.)


Broiled Bananas with Citrus, Toasted Almonds, and Vanilla Yogurt
Based on a recipe from Yamuna Devi's Lord Krishna's Cuisine
Juice of one lime
Juice of one orange (large chunks of orange are OK, even desirable)
1/4 teaspoon cinnamon
1/4 teaspoon ground cardamom*
2 tablespoons melted ghee or butter (ghee is preferable)
4 firm bananas
1/4 cup brown sugar
2 tablespoons blanched slivered almonds
Vanilla yogurt (for spooning on top)
Preheat your oven's broiler. In a small container mix together the lime juice, orange juice, cinnamon, and cardamom. Lightly grease a small rimmed baking sheet with a little bit of the ghee. Slice the bananas in half lengthwise and place on the baking sheet cut side up. Pour the juice over the bananas, drizzle with the rest of the ghee, and sprinkle the brown sugar on top.
Place the baking sheet under the broiler, and broil for about 4 minutes, or until the bananas are a bit browned and bubbly. Sprinkle the almonds on top of the bananas and return to the broiler for a couple more minutes, until the almonds are golden brown. Serve with dollops of vanilla yogurt on top. (This makes an excellent dessert, but I think it would also be great on oatmeal or French toast for breakfast.)
*If you have a coffee grinder, I recommend grinding whole cardamom pods in it. Then grind your next batch of coffee beans without cleaning out the cardamom residue. Best coffee ever!
January 4, 2011
Sick Kid, Sick Me
My very cranky four-year-old has morphed into a sick four-year-old, and I have morphed into sick mom. So no post this week. But if you are looking for something good to read, here's a nice interview with "fermentation fetishist" Sandor Katz in one of my favorite magazines, The Sun.
December 28, 2010
The Roast Beast Conundrum
Christmas is a difficult time for me, cooking-wise. My side of the family (carnivorous Lutherans) has certain expectations about what should be eaten, and my husband's side of the family (strict vegetarian Hindus) has very definite rules about what should NOT be eaten. My side, like the Whos in Whoville, wants some sort of roast beast. The other side is sickened by the mere thought of roast beast. Sickening people is not something to which a cook aspires, yet at the same time making one's family upset about missing Christmas dinner is also no fun. (I've always been jealous of people who brag about making things like sushi for Christmas dinner. This simply would not fly in my family. Nor would Tofurkey or lentil-nut loaf. Vegetarian lasagna with red sauce, not white, is as crazy as I dare to go without inciting rebellion.)
In early December I got into a conversation with an acquaintance who was raised on a farm in rural Mississippi. The mice were starting to run rampant in the barn, so one day when he was about seven or eight years old, his grandmother called him over and had him kill all the mice one by one with a pitchfork. After relating this story, he told me, "I really think people who have been brought up on farms have the greatest respect for life of any people."
I thought about what he said, my brain buzzing with cognitive dissonance. My dad grew up on a family dairy farm in northern Minnesota. He declined taking on the farm, saying "there's no living in it," (which was sadly true), and went to college and became a research scientist instead. Yet every year he went back Up North to go deer hunting with his brothers. We'd hear tires crunching gravel, then run to watch from the front window as they strung the deer up, blood dripping and making a red mess in the pure white snow. One year I told my little cousin, "Your dad shot Bambi's mom," and he cried for half an hour. Not one of my finest moments, but it was my true sentiment. Having grown up in the suburbs eating meat that came from styrofoam packages covered with plastic wrap, I thought my dad and uncles were callous and cruel. I didn't understand their need to "go out and kill something" at all.
But then we all moved to Seattle, and my dad didn't go deer hunting anymore, and I didn't really think about it much until my friend's pitchfork tale. Then I struggled: pairing "killing mice with a pitchfork" with "respect for life." Then something clicked: No matter what we do, others must die so that we may live. Maybe people who live on farms understand this better than most, because they witness it firsthand. Maybe the question is not "What should I eat?" Maybe the question is, "How can I live in a manner that is most respectful of life?" (For what it's worth, I have long believed that anyone who respects life on this planet would do better to fight corporate control of the world's resources rather than simply stop eating meat.)
With these thoughts fresh in my mind, and feeling ornery about the approach of Christmas and my annual inexplicable need to work myself to the point of absolutely insufferable irritability for a meal that no one was truly excited about, I decided to lobby for a Christmas ham. I did this by picking an argument with my husband wherein I questioned the ethics of his vegetarianism.
I asked him, "What if you have to kill a hundred mice to protect the grain that makes your bread? How is that better than killing one pig for a ham?"
He didn't have an answer to that question. Or rather, he has several answers, but he's still thinking about it. So did we have ham for Christmas dinner? No, we had vegetarian lasagna with red sauce. But however our argument ends, I think we both agree that logic alone does not control our food choices. That, and nothing beats the sheer determination of the Tamil Brahmin vegetarian to not eat meat or have it cooked in the home. (Sorry, no pictures. I was too busy with life. Here's a picture of the new casserole dish I bought, sure to be the vessel of many Christmas lasagnas to come.)

In early December I got into a conversation with an acquaintance who was raised on a farm in rural Mississippi. The mice were starting to run rampant in the barn, so one day when he was about seven or eight years old, his grandmother called him over and had him kill all the mice one by one with a pitchfork. After relating this story, he told me, "I really think people who have been brought up on farms have the greatest respect for life of any people."
I thought about what he said, my brain buzzing with cognitive dissonance. My dad grew up on a family dairy farm in northern Minnesota. He declined taking on the farm, saying "there's no living in it," (which was sadly true), and went to college and became a research scientist instead. Yet every year he went back Up North to go deer hunting with his brothers. We'd hear tires crunching gravel, then run to watch from the front window as they strung the deer up, blood dripping and making a red mess in the pure white snow. One year I told my little cousin, "Your dad shot Bambi's mom," and he cried for half an hour. Not one of my finest moments, but it was my true sentiment. Having grown up in the suburbs eating meat that came from styrofoam packages covered with plastic wrap, I thought my dad and uncles were callous and cruel. I didn't understand their need to "go out and kill something" at all.
But then we all moved to Seattle, and my dad didn't go deer hunting anymore, and I didn't really think about it much until my friend's pitchfork tale. Then I struggled: pairing "killing mice with a pitchfork" with "respect for life." Then something clicked: No matter what we do, others must die so that we may live. Maybe people who live on farms understand this better than most, because they witness it firsthand. Maybe the question is not "What should I eat?" Maybe the question is, "How can I live in a manner that is most respectful of life?" (For what it's worth, I have long believed that anyone who respects life on this planet would do better to fight corporate control of the world's resources rather than simply stop eating meat.)
With these thoughts fresh in my mind, and feeling ornery about the approach of Christmas and my annual inexplicable need to work myself to the point of absolutely insufferable irritability for a meal that no one was truly excited about, I decided to lobby for a Christmas ham. I did this by picking an argument with my husband wherein I questioned the ethics of his vegetarianism.
I asked him, "What if you have to kill a hundred mice to protect the grain that makes your bread? How is that better than killing one pig for a ham?"
He didn't have an answer to that question. Or rather, he has several answers, but he's still thinking about it. So did we have ham for Christmas dinner? No, we had vegetarian lasagna with red sauce. But however our argument ends, I think we both agree that logic alone does not control our food choices. That, and nothing beats the sheer determination of the Tamil Brahmin vegetarian to not eat meat or have it cooked in the home. (Sorry, no pictures. I was too busy with life. Here's a picture of the new casserole dish I bought, sure to be the vessel of many Christmas lasagnas to come.)

December 21, 2010
Chocolate Truffles: Easy Last-Minute Homemade Gift

It's T-3 days to Christmas morning, and I know time is short for you as well as me, so I'll make this brief: If you are looking for last-minute little Christmas gifts, you easily have time to make chocolate truffles. People love buttery smooth chocolates so much more than useless junk you get at the mall. (Uh, gee, thanks, Aunt Madge. The red and green sequins really make Rudolph seem to jump right out of the sweater.) And everyone will be so impressed that you made them yourself. Better yet, get your kids to make them. I know they need something to do now that winter break is here. Even more important, they need something to do that is actually useful. I think making Christmas gifts fits the bill. If your child can roll play dough into a ball, then he or she should be able to make truffles.

There are only four ingredients (cream, butter, chocolate, and cocoa powder), so be sure to use high quality ingredients, especially with regard to the chocolate. Ghirardelli is a good choice. I used their recipe, which conveniently was on the back of my bar of chocolate. It's dead simple, and turned out nicely. You can find the same recipe here, using chocolate chips. Replace the chocolate chips with two bars of bitter-sweet chocolate if you wish. If you want to get a little bit fancier, you could go over to Simply Recipes and try Garrett's truffles. You could also try rolling little bits of dried fruit into your truffles. I had intended to incorporate dried cherries into ours, but we ate all the dried cherries before I had a chance to do this. Oh well, such is life.

To wrap our truffles, we placed several into a foil cupcake liner, then tied a square of tissue paper around the liner. Easy! Word of warning: You will likely need to make a double batch if you are planning on giving any away at all. Merry Christmas!
December 14, 2010
Sweet Potatoes with Your Cumin

When I was a childless, carefree twenty-something in Seattle, I lived a couple blocks away from the food co-op. At that time in my life, I was fairly undisciplined, and thought nothing of jaunting over to the co-op deli counter and spending five bucks for a small container of cumin roasted sweet potatoes. How I loved those sweet potatoes. The key to their fabulousness lay in the heavy-handed application of cumin. No light dusting for these sweet potatoes. No, on first bite you had to think, "Whoa, cumin." Then, "Oh, sweet potatoes!" And I also loved their chicken salad, which had purple grapes sliced lengthwise, and chunks of walnut in it. I would still pay good money for that. It was the perfect blend of sweet and savory, with nice big chunks of chicken. Not too mayonnaisey, either.
But back to the sweet potatoes. My thirty-something self wants to give my twenty-something self a sharp rap on the knuckles for paying that much for something I can buy for $0.79 a pound, and cook without even batting an eyelash. I am unfortunately still relatively undisciplined, but my lack of discipline currently expresses itself through buying half-off baked goods after 6 pm at the local bakery/deli/meat shop. But then again, it's a lot harder to make a Faux-stess cupcake (Hostess cupcake copy-cat) than it is to make these cumin roasted sweet potatoes.
These make a good side dish with Mexican food, or would be good as sweet potato tacos served in soft corn tortillas with crumbled cotija cheese and avocado sauce* drizzled on top. (And kids seem to love them.)
*By avocado sauce, I mean avocado, sour cream, garlic, and lime juice blended together, with a little salt.

Cumin Roasted Sweet Potatoes
5 or 6 small sweet potatoes, peeled and cut in rounds about ½ inch thick
one onion, halved crosswise and sliced, cutting along the root/top axis
a few glugs of canola oil
approximately 2 tablespoons ground cumin
salt
Preheat oven to 425°. Place your sweet potatoes and onions on a large sheet pan, then pour a good amount of canola oil on them. Use your hands to mix the oil so that it fairly evenly coats the sweet potatoes and onions. Add the cumin and again use your hands to mix, so that it is evenly distributed. Spread the sweet potato mixture evenly over the sheet pan, and sprinkle salt over it all. Place on the center rack of the oven and bake for about 40 minutes, or until sweet potatoes are soft and lightly browned, and onions are soft and caramelized at the edges.
And now, because I can, I ask you to go and listen to this. You might want to be up on your feet first.
December 7, 2010
Latkes for All

As you know, the Holiday Season™ is upon us, which in our family kicked off a bit early with Diwali at the beginning of November. Then Thanksgiving came around at the end of November. Honestly, Thanksgiving is always a let down for me. I am just used to the Thanksgivings of my childhood, where we'd go to my grandma's and there'd be twenty aunts and uncles and forty cousins and so much cigarette smoke you couldn't smell the turkey in the oven, or even breathe for that matter. How I miss those days. I say that with not even a touch of sarcasm. It really was a better time we lived in back then.
Anyway, last week as I was wallowing in post-Thanksgiving self pity, looking ahead toward Christmas, my four-year-old approached me demanding to know when we were going to celebrate Hanukkah. "But honey," I tried to explain, "see, we don't celebrate Hanukkah because we're not Jewish."
The child stared at us for a moment, then repeated in a much louder voice, "WHEN ARE WE GOING TO CELEBRATE HANUKKAH?"
So I figured, what the heck? Why not? Maybe it'll cheer me up to make some latkes. And it actually did cheer me up. It's amazing what the lack of expectations and pressure will do to lighten the holiday mood. Even better, some Jewish friends heard about my daughter's determination to celebrate Hanukkah, and thought that was a great excuse for them to hold their own latke party. So we got to have latkes two nights in one week. Ironically, my girl wouldn't touch the latkes with a ten-foot pole. (Of course, she did eat the applesauce.) Thank goodness I can count on the six-year-old to eat anything, so I can blame the perversity of genetics and not my lack of parenting skills.
Now the four-year-old wants to celebrate Kwanzaa, as well as Bahala, which as far as I know is a holiday she made up completely on her own. I have a feeling we've created a monster.
Latkes (How I Made Them)
Latkes are, as you may already know, nothing more than potato pancakes. This is how I made them, and I thought they were quite tasty. It seems everyone has a different way of making them, and I am sure they are all quite tasty. It's hard to go wrong with potatoes and onions fried in lots of oil, is my thinking.
I based my recipe on Joan Nathan's recipe in The Children's Jewish Holiday Kitchen. Ms. Nathan's variation called for zucchini and carrots in addition to potatoes. I decided to go with just carrots and potatoes. The carrots added an attractive touch of color, and stayed a little crunchier for added texture. But I did something else that was even more unorthodox, and purely my own inspiration: Instead of adding matzo meal or flour, I used pulverized yellow corn tortilla chips. Please don't hate me if you're a purist. Just use matzo meal or flour. But the tortilla chips did taste good. I didn't intend to make my latkes that way. I had intended to use matzo meal. But the first store I went to had no matzo meal, and for some bizarre reason only light sour cream. (Yes, I know, what is this world coming to? I mean, if you're that afraid of the fat just don't eat the sour cream. Don't force the abomination known as "light" sour cream on us, with its modified corn starch, guar gum, carrageenan, locust bean gum, gelatin, etc. Have you no decency?) The second store I went to had normal sour cream, but still no matzo meal. Don't ask me why. It was the first day of Hanukkah, so I thought it'd be easier. I really didn't have the time to visit a third store, so I called it quits on the matzo meal. I'm sure flour would have worked just as well, but you know me. Once I thought of using the tortilla chips, I had to see what would happen.
One more thing: Our friends included baking powder in their latkes. Some recipes call for baking powder, some don't. It makes for a fluffier latke, so feel free to add a couple teaspoons of baking powder if you like fluffiness.
Traditionally, latkes are served with sour cream and applesauce. (I'm not going to tell you to serve them with salsa and black beans. Wink, wink.)

3 medium sized russet potatoes, peeled
3 medium sized carrots, peeled
1 onion
3 eggs, beaten
1/2 to one teaspoon salt
pepper
3/4 cup corn tortilla chips, pulverized in food processor (or same amount of matzo meal, or flour)
oil for frying
Grate potatoes, carrots, and onion together into a large bowl. Gather the grated vegetables into a clean cotton towel and squeeze all excess liquid out, then return the vegetables to the bowl. Add the eggs, salt, and pepper, and combine. Add the pulverized tortilla chips and combine.
Heat several tablespoons of oil in a skillet, and heat. Form 3-inch wide patties with the potato mixture, and fry a few minutes until deep brown on one side. Flip, and fry the other side until deep brown. Serve immediately, with applesauce and sour cream.
November 30, 2010
Cabbage Eaters of the World, Unite!
[The demands of my job, my family, and my household have gotten the better of me this week. So I leave you with this re-rerun, which originally aired on January 23. It's one of my favorite posts. By the way, I can't believe I've been doing this long enough to have material for re-runs. Almost a year! I think I'll need to celebrate that anniversary somehow.]

I come from a long line of cabbage-eaters. While I’m only half German, and therefore technically only half cabbage-eater according to the official definition (as defined by Cassell's Dictionary of Slang), I’m pretty sure the Finnish side has eaten more than its fair share of cabbage through the ages. The sad thing is, I can’t remember once in my life being served cabbage by any of my blood relatives. In fact, the only time I’ve ever been served cabbage (by someone other than myself) has been in the form of curry cooked by my Indian mother-in-law. Well, unless you count coleslaw. Which doesn’t really count, as it’s not cooked and therefore doesn’t carry the same baggage (ie: smell, much associated in times past with working class immigrant homes).
I’m not sure why it took me so long to be exposed to the wonders of cooked cabbage – maybe my relatives wanted to distance themselves from its pejorative connotations. Or maybe I just grew up in a time and place when all vegetables came from a can, and as far as I know, they don’t sell canned cabbage. (Very fortunate.) I think I was finally in my early to mid-twenties before I gave it a try and cooked some for myself.
As a side note, as I write this, I have in the back of my mind an M.F.K. Fisher essay from 1937 – “The Social Status of a Vegetable.”
At any rate, I love cabbage and I'm not afraid to admit it. And while cabbage curry is delightful, sometimes I don't want too many extra ingredients coming between my taste buds and the sweet taste of the cabbage. So I was browsing my usual internet haunts, and came across this lovely recipe for Noodles and Fried Cabbage on Salon. It calls for nothing more than cooked noodles, cabbage, salt, pepper, and a truly ridiculous amount of butter (which believe it or not I actually reduced by more than half in my own version below). The author claims a Hungarian origin for this recipe, but I found that it's also considered to be German and Polish (the Polish name for it being haluski, and apparently it's hugely popular in Pittsburgh). Some people also fry onions along with the cabbage, and I briefly considered doing so myself, but swiftly decided against it, as I think for this dish it should be all about the cabbage. It might seem crazy, but it really worked for me. Really. And don't be scared of the butter. We peasants need it, to keep our backs strong. Well, I don't know if it will keep your back strong, but it will keep you pleasantly full figured. As my great-grandmother always said, and I really do believe this is true, "You need a little bit extra on you, in case you get sick."
Here's the version I came up with:
Fried Cabbage and Noodles
Adapted from Ann Nichols on Salon.com
Ingredients
1 large head of cabbage, thinly sliced in two-inch long pieces
1 and a half sticks of salted butter
1 pound of egg fettucine, cooked (You need egg noodles, it's just not the same without it. You could use the regular wide egg noodles, but I thought the egg fettucine had a nice toothsome thickness to it which worked well with the tender cabbage.)
salt to taste
freshly ground black pepper
Cook the noodles and drain according to package directions. Melt the butter in a pot large enough to hold all the cabbage. Throw in the cabbage and some salt and cook on medium to medium-high heat until the cabbage is very tender, and a bit brown in spots. Throw the drained noodles into the pot with the cabbage and mix thoroughly. Add more salt if needed. Serve with freshly ground black pepper on top. Don't skip the pepper – seriously, it's really important.

I come from a long line of cabbage-eaters. While I’m only half German, and therefore technically only half cabbage-eater according to the official definition (as defined by Cassell's Dictionary of Slang), I’m pretty sure the Finnish side has eaten more than its fair share of cabbage through the ages. The sad thing is, I can’t remember once in my life being served cabbage by any of my blood relatives. In fact, the only time I’ve ever been served cabbage (by someone other than myself) has been in the form of curry cooked by my Indian mother-in-law. Well, unless you count coleslaw. Which doesn’t really count, as it’s not cooked and therefore doesn’t carry the same baggage (ie: smell, much associated in times past with working class immigrant homes).
I’m not sure why it took me so long to be exposed to the wonders of cooked cabbage – maybe my relatives wanted to distance themselves from its pejorative connotations. Or maybe I just grew up in a time and place when all vegetables came from a can, and as far as I know, they don’t sell canned cabbage. (Very fortunate.) I think I was finally in my early to mid-twenties before I gave it a try and cooked some for myself.
As a side note, as I write this, I have in the back of my mind an M.F.K. Fisher essay from 1937 – “The Social Status of a Vegetable.”
At the word spinach her face clouded, but when I mentioned cabbage a look of complete and horrified disgust settled like a cloud. She pushed back her chair.At the end of the essay, Ms. Fisher asks, "Who determines, and for what strange reasons, the social status of a vegetable?" I really don't know, but I bet someone somewhere has written a Ph.D. dissertation on the subject since then. The question that's been troubling me is this: If cabbage is the low-brow vegetable, then what is its opposite? What is the high-brow elitist vegetable of our time? One that immediately sprang to my mind was arugula. And then I laughed, because arugula is actually in the same plant family as cabbage (Brassicaceae), so they're related! Poor country bumpkin cousin cabbage.
"Cabbage!" Her tone was incredulous.
"Why not?" James asked, mildly. "Cabbage is the staff of life in many countries. You ought to know, Mrs Davidson. Weren't you raised on a farm?"
Her mouth settled grimly.
"As you know, she remarked in any icy voice, with her face gradually looking very old and discontented again, "there are many kinds of farms. My home was not a collection of peasants. Nor did we eat such – such peasant things as this."
At any rate, I love cabbage and I'm not afraid to admit it. And while cabbage curry is delightful, sometimes I don't want too many extra ingredients coming between my taste buds and the sweet taste of the cabbage. So I was browsing my usual internet haunts, and came across this lovely recipe for Noodles and Fried Cabbage on Salon. It calls for nothing more than cooked noodles, cabbage, salt, pepper, and a truly ridiculous amount of butter (which believe it or not I actually reduced by more than half in my own version below). The author claims a Hungarian origin for this recipe, but I found that it's also considered to be German and Polish (the Polish name for it being haluski, and apparently it's hugely popular in Pittsburgh). Some people also fry onions along with the cabbage, and I briefly considered doing so myself, but swiftly decided against it, as I think for this dish it should be all about the cabbage. It might seem crazy, but it really worked for me. Really. And don't be scared of the butter. We peasants need it, to keep our backs strong. Well, I don't know if it will keep your back strong, but it will keep you pleasantly full figured. As my great-grandmother always said, and I really do believe this is true, "You need a little bit extra on you, in case you get sick."
Here's the version I came up with:
Fried Cabbage and Noodles
Adapted from Ann Nichols on Salon.com
Ingredients
1 large head of cabbage, thinly sliced in two-inch long pieces
1 and a half sticks of salted butter
1 pound of egg fettucine, cooked (You need egg noodles, it's just not the same without it. You could use the regular wide egg noodles, but I thought the egg fettucine had a nice toothsome thickness to it which worked well with the tender cabbage.)
salt to taste
freshly ground black pepper
Cook the noodles and drain according to package directions. Melt the butter in a pot large enough to hold all the cabbage. Throw in the cabbage and some salt and cook on medium to medium-high heat until the cabbage is very tender, and a bit brown in spots. Throw the drained noodles into the pot with the cabbage and mix thoroughly. Add more salt if needed. Serve with freshly ground black pepper on top. Don't skip the pepper – seriously, it's really important.
November 23, 2010
Green Tomato Pickle, South Indian Style

For some reason it took me a long time to find green tomatoes here in Georgia in the fall. But find them I finally did, a couple weeks ago, at the tail end of the season just before the first frost. Which ironically came early, after an unusually warm fall. It was also ironic that my friends in Minnesota and Seattle had plenty of green tomatoes – the summer never got warm enough for their tomatoes to ripen. I don't think they had much sympathy for my green-tomato-less plight.
If you happen to have a pile of green tomatoes lying around, and are sick of the usual suspects (fried green tomatoes do get tiresome after awhile) I recommend making this South Indian style green tomato pickle, which I learned from my mother-in-law. Like all Indian pickles, it's salty, tart and spicy, and this one has that nice tomato umami flavor to round it out. Traditionally, Indians consume a bit of pickle with yogurt rice. Yogurt rice at its most basic is just that – plain yogurt mixed with rice. You could get fancier with the seasoning, and someday I will try to get around to explaining that, but you don't have to. Yogurt, rice, and a bit of salty pickle will do the trick. Typically South Indians will eat yogurt rice at the end of the meal. It's said to have a cooling effect and to help digestion. Sometimes, yogurt rice with pickle is my meal. What can I say? I love it.
Which leads me to a little story. In the very early days of our relationship, my husband had me over to dinner at his place. This dinner consisted of yogurt rice, pickle, and potato chips. This was one of two standard dinners for him at the time. The other dinner consisted of peanut butter and jelly sandwiches and potato chips. We sat down at his dining table, without silverware. He looked at me. "My people eat with their hands," he said. I looked at him. "OK," said I. So we both dug in. He ate quickly and neatly, blithely flicking balls of yogurt rice into his mouth without touching his lips. I ate like an eighteen-month-old toddler, smashing white mush into my face with my ham-handed fist. But I ate that yogurt rice with pickle all up. And had seconds and thirds. He has told me it was at that moment he first thought he could marry me.
Now you know the story of yogurt rice with pickle, and how it led to my family's existence. Happy Thanksgiving, everyone.

South Indian Green Tomato Pickle
4 tablespoons sesame oil (not the brown roasted sesame oil; unroasted sesame oil is golden in color, also known as gingelly oil at the Indian grocery)
2 teaspoons brown mustard seeds
¼ teaspoon asafoetida
2 teaspoons whole fenugreek seeds, ground
Approximately 15 medium-sized green tomatoes, chopped into one-inch pieces
2 teaspoons chili powder* (from ground dried birdseye chilies, or cayenne pepper)
1 teaspoon turmeric
Salt
Heat the sesame oil and mustard seeds in a large saute pan, until the mustard seeds start to sputter and pop out of the pan. Turn down the heat and quickly add the asafoetida and fenugreek. Stir for just a few seconds, then add the green tomatoes. (Do not burn the fenugreek, as it will become very bitter.) Stir to combine, then add the chili powder, turmeric, and some salt. Stir to combine. Cook on medium heat, stirring occasionally to prevent scorching, until all the tomato juice is cooked away, and the tomatoes are completely broken down and sauce-like in texture. This may take up to an hour. Taste and add more salt if necessary. The pickle should taste very salty. Store in jars and serve with yogurt rice. Or be creative. I'm sure there are several uses for this I haven't thought of yet.
*The chili powder found in Indian markets is made from ground dried red chilies, and is different from the spice mix called "chile powder" found in supermarkets. Cayenne pepper is a good substitute.
November 16, 2010
Sick Person's Soup

It's just over a week until Thanksgiving, and the food blogosphere is rife with Thanksgiving recipes. Call me contrary, but I'm writing about this spicy soup instead. You could serve this soup for Thanksgiving, but its gingery explosiveness would probably cause steam to come out of your Aunt Mildred's ears. She might start gagging, and gesticulating wildly just as Uncle Simon was passing the gravy, knocking it out of his hands and down onto the front of her flower print dress, and then she might scream in pain as hot gravy spread across her ample bosom, jump up and accuse you of trying to kill her and storm out of the house, get into her car and drive away, never to speak to you for twenty years until she's on her death bed and finally relents and calls you to her side to tell you she's decided to leave you her collection of cow figurines in her will. And we don't want that. Better stick to turkey and mashed potatoes. But after Thanksgiving, when you're sick of all those heavy carbs, and feeling run down from all the cooking and having to bite your tongue to ensure civility at the dinner table, you can make this soup and eat it all by yourself if you so desire.
The soup is based on a recipe for Sick Person's Soup from the excellent "Vegetable Soups from Deborah Madison's Kitchen." (Deborah Madison is the author of "Vegetarian Cooking for Everyone," my go-to tome for pretty much everything.) I wasn't sick when I made this, and hopefully now I'll stay that way. This soup packs a wallop, enough to keep those germs away at least through New Year's, I'd say. Never underestimate the power of 12 cloves of garlic and three tablespoons of grated ginger. And the cabbage and miso and lime juice work their magic as well.
The original recipe called for even more ginger. You can add more if you want, but three tablespoons was more than enough for me. I also added a little soy sauce, soft tofu, and Asian wheat noodles (they resembled fettucine) to make it more of a meal. You could sub in another noodle if you wish. Just use what you have. Rice noodles would work well, or soba. Or heck, just use fettucine. I really liked the heft of my thick fettucine-like noodles – their solidity really worked well as a counter-balance to the intense sour lime, fiery ginger broth.
Sick Person's Soup
Adapted from "Vegetable Soups from Deborah Madison's Kitchen"
5 cups Chinese cabbage, chopped
1 celery rib, sliced
1 small onion, thinly sliced
1 carrot, thinly sliced
12 garlic cloves, 6 sliced and 6 finely chopped
16 oz. soft tofu, cut in 1-inch cubes
3 tablespoons grated ginger
1 jalapeño pepper, diced
Juice of 1 lime
¾ cup white miso
Splash of soy sauce
Splash of roasted sesame oil
Salt to taste
Noodles, cooked according to package directions (flat Asian wheat noodles would work well)
Bring 8 cups of water to boil in a large pot. Add the cabbage, onion, carrot, and 6 sliced garlic cloves, lower the heat, and cover. Simmer for 15 minutes. Add the tofu and simmer for a couple of minutes more. Turn off the heat and add the finely chopped garlic, jalapeño, lime juice, and miso. (It's helpful to first dissolve the miso in a bit of the soup water before adding it to the pot.) Add a splash of soy sauce and splash of roasted sesame oil. Add salt to taste. Ladle soup into bowls and add a serving of noodles to each bowl. Add more soy sauce and garnish with sriracha if desired.
Sick Person's Soup
Adapted from "Vegetable Soups from Deborah Madison's Kitchen"
5 cups Chinese cabbage, chopped
1 celery rib, sliced
1 small onion, thinly sliced
1 carrot, thinly sliced
12 garlic cloves, 6 sliced and 6 finely chopped
16 oz. soft tofu, cut in 1-inch cubes
3 tablespoons grated ginger
1 jalapeño pepper, diced
Juice of 1 lime
¾ cup white miso
Splash of soy sauce
Splash of roasted sesame oil
Salt to taste
Noodles, cooked according to package directions (flat Asian wheat noodles would work well)
Bring 8 cups of water to boil in a large pot. Add the cabbage, onion, carrot, and 6 sliced garlic cloves, lower the heat, and cover. Simmer for 15 minutes. Add the tofu and simmer for a couple of minutes more. Turn off the heat and add the finely chopped garlic, jalapeño, lime juice, and miso. (It's helpful to first dissolve the miso in a bit of the soup water before adding it to the pot.) Add a splash of soy sauce and splash of roasted sesame oil. Add salt to taste. Ladle soup into bowls and add a serving of noodles to each bowl. Add more soy sauce and garnish with sriracha if desired.
November 9, 2010
At Long Last, Sambar That Tastes Like Sambar

I've known my husband for more than eleven years, and in that time I've cooked a lot of Indian food. I started out not knowing anything at all, but I like to flatter myself that I've gotten pretty good. Still, in all that time, a prize has eluded me. The prize of sambar. It seems simple – just a vegetable-lentil stew, flavored with sambar powder spice blend and the tang of tamarind. It's daily fare in millions of South Indian homes. Every home's sambar seems to taste different, and I love that. I'm OK with 'different,' and mine was decent, but just not... right. Not the way I wanted it to be.

Awhile back we were staying with my in-laws, and my mother-in-law asked me to roast a combination of channa dal, dried coconut, and red chilies. Then she had me grind it into a paste and add it to the sambar.
Suddenly the clouds parted and a ray of light shone down from the heavens. As the angels started to sing, I thought, "I haven't been doing this. Maybe this is what I need to do."
"Amma," I asked, "Do you do this every time?" She answered something to the effect of, "You don't need to, but it's a nice touch." Translation, in my own mind: "Yes, this is why my sambar tastes so awesome."
In all my years of making sambar, this final step had somehow escaped me. You wouldn't believe how many things get lost in translation – and this one was a biggie. (Which proves my own personal philosophy: Doing is better than talking.)

Fast forward to Diwali Celebration 2010, ie: last Friday's dinner. In honor of the Festival of Lights, I decided to make onion sambar, adding the previously missing channa dal/coconut paste. Eureka! Rama and Sita return to Ayodhya, good triumphs over evil, and my sambar tastes like sambar! Happy belated Diwali!
Onion Sambar
First, start cooking the lentils:
1 cup toor dal*
4 cups water
Rinse the toor dal three times in a large sauce pan, then add four cups water. Bring to a boil, then lower heat to a simmer. Skim off any foam that appears. Cook for approximately 40 minutes, or until the lentils are very soft and falling apart. Add water if the lentils look like they are drying out. When lentils are done cooking, take a wire whisk and whisk them into a rough puree.
While the lentils are cooking, start cooking the onion:
2 tablespoons coconut oil
2 teaspoons black mustard seeds
1 Thai green chili, halved lengthwise (or about ¼ of a jalapeno)
2 teaspoons sambar powder**
¼ teaspoon asafoetida
one onion, cut in half crosswise, then cut lengthwise along the grain into pieces slightly less than an inch wide
2½ - 3 cups water
1 slightly heaping teaspoon of tamarind concentrate
salt
Heat the coconut oil, mustard seeds, and green chili in a large heavy-bottomed pot until the mustard seeds turn grey and start sputtering out of the pot. Turn down the heat, add the sambar powder and asafoetida, and stir for a few seconds. Add the onion and stir to coat with the spices. Cook the onion for a few minutes, then add the water to cover the onions well. Dissolve the tamarind concentrate in a bit of water, and add it to the onion mixture. Add some salt, and bring to a boil. Once the mixture starts to boil, lower the heat and simmer, covered, until the onions are soft, about 20 minutes.
While your onions are simmering, make the coconut/channa dal paste:
2 teaspoons coconut oil (plus 1 additional tablespoon, for finishing)
2 dried red chilies (small, like Thai chilies)***
3 tablespoons dried flaked coconut
3 tablespoons channa dal****
small amount of water
Heat the 2 teaspoons of oil in a small skillet (reserve the 1 tablespoon for the end), then add the chilies, coconut, and channa dal. Roast on medium heat until the coconut is light brown. Take care not to scorch it. Puree the coconut/dal mixture in a blender with a small amount of water to make a paste.
When the separate elements are done, you just need to put them together. Add the whisked toor dal to the cooked onions (reserving a small amount of plain dal for your kids if necessary), then add the coconut/channa dal paste, and mix. Add more salt if necessary. Add the final tablespoon of coconut oil, and simmer the sambar for a few minutes. That's it. Serve with rice and a nice vegetable curry.

*You will most likely need to go to an Indian grocery for toor dal, though an upscale grocery like Whole Foods, or natural foods grocery may carry it. The Indian store will be the least expensive.
**Sambar powder can also be found at your local Indian store. My mother-in-law makes her own, and gives me a huge jar periodically. However, I recently ran out and ended up buying some from the store. I used Priyom brand, which contains red chili, coriander, turmeric, fenugreek, asafoetida, pepper, curry leaves, urad dal, gram dal, and salt. It tasted authentic to me.
***Go to, you guessed it, the Indian grocery store. Lots of dried red chilies there.
****Did I mention you really should get yourself on over to the Indian grocery store?
November 2, 2010
Reforming Bad Apples: Roasted Applesauce

You know the saying, “One bad apple spoils the whole barrel”? That saying didn’t just come out of nowhere – the ethylene gas given off by the overripe apple signals the other apples to ripen. (Pretty amazing that they can do that, don't you think?) So you can imagine my dismay when, during our recent family apple picking outing, I realized the four-year-old had been picking the windfalls up from the ground and putting them in our bag, along with all the good apples.
“Stop! Don’t do that!” Her hand froze, hovering with worm-eaten apple just above the bag. “We can only use the apples from the trees. Those apples on the ground are bad.”
“OK, Mommy.”
“Did you put any others in there?”
“No,” she said, smiling up at me angelically.
I rooted through the bag, and pulled out as many wormy, faintly rotting apples as I could find.
I realized I probably didn’t find them all a couple weeks later, when I smelled the tell-tale fragrance of apple cider vinegar. I inspected the apples one by one, found three or four fully rotten ones dribbling their vinegary juices all over the place, and determined the others were now prematurely past their prime, mealy and definitely not vibrant in flavor.
Bummer. Only one thing to do with them: Make applesauce.
The great thing about applesauce is that you can use less than stellar apples, and no one will ever know the difference. This is because applesauce gives you the freedom to doctor up your apples, and remedy whatever ails them, through the judicious addition of lemon juice, sugar or honey, and spices.

I decided to try roasting my apples rather than boiling them, first and foremost because I am lazy and don’t want to hover over a pot of boiling apples, much less peel and slice them. But I also know that roasting tends to concentrate flavor and sweetness, and decided that this was the way to go with my very unflavorful, unsweet apples. Whatever flavor there was would be intensified.
Anyhow, it worked. The roasting process gave the sauce a faintly caramel taste, and the texture was fantastic – very thick and a bit lumpy. (I don’t like my applesauce to be watery and smooth like baby food.) And you don’t have to peel or slice anything! Woohoo! Nor do you you need a food mill! Double woohoo!

Roasted Applesauce
A little note: If you are going to add a little spice to your applesauce, why not forego the usual cinnamon, and try a small amount of Chinese five-spice powder instead? The spices in it work really well with apples, and if you just do a small amount, it will have a lovely, subtle effect, and everyone will say your applesauce tastes great, and wonder what the heck you did to it. (My five-spice powder has cinnamon, star anise, fennel, ginger, cloves, white pepper, and licorice root, which technically is seven spices, but who's counting? Different brands will be slightly different, but still good. The traditional version has Szechuan peppercorns, star anise, cloves, cinnamon, and fennel. Just five. )
Oil, for greasing pan
8 apples, halved and cored (keep skins on)
Sugar, or honey, to taste
Lemon juice, to taste
Dash of salt
¼ to ½ teaspoon Chinese five-spice powder (Taste first before adding more. A little goes a long way.)
Preheat oven to 375°. Grease a large sheet pan with a neutral-flavored oil. Halve lengthwise and core eight apples, leaving the skins intact. Arrange the apples cut side down on your baking sheet, and place the sheet on the rack in the center of your oven. Bake for approximately 45 minutes, or long enough for the apples to start browning on the cut surface. (This is the delicious caramelization that you want.)
Remove apples from oven, and using an offset spatula remove them from the pan onto a plate to let them cool. Once apples have cooled, use a large spoon to scrape the apples out of their skins into a bowl. Mash the apples with a fork to desired texture. Add and mix in sugar or honey, lemon juice (usually just a generous squirt is needed), salt, and five-spice powder as desired. Or just be normal and add cinnamon – your sauce will fail to be anything but delicious. This sauce freezes well.

October 26, 2010
Waffling: A Tribute to Irma S. Rombauer

My kids are like wolves: If they sense the slightest hesitation or weakness, they will hone in for the kill. The four year old will issue deeply wounded, plaintive cries beginning with phrases like, "You NEVER let..." And the six-year-old will badger me into submission with her impeccable memory: "Remember, LAST WEEK, you said..."
So that's how I ended up making waffles for Sunday breakfast, even though I didn't really feel like it at first. I was planning on making pancakes, which I'd already promised the day before, and knew I couldn't get out of, even though I was tired. You see, I'd stayed up into the wee hours watching a particularly bad John Travolta movie on TV, all by myself because my husband was away at a conference. I don't know why I did it; but I did, and now it was 7:30 am, and they wanted waffles. "Well," I said, "I don't know... they take more time... I have to get out the waffle iron..."
You know that feeling of inertia which is so great it makes even the simplest of tasks seem like an unscalable mountain? That's how digging out the waffle iron felt to me. The kids sensed my indecision, my incoherence, my waffling, if you will, and unzipped their sheep costumes. The wolves came out and went for the jugular. I had no choice but to get down on my knees and root around in the back of a very full cabinet for the waffle iron.
Despite my grumbling, it wasn't so bad. It only took a couple of minutes to extricate it from the tangle of cords and jumble of seldom used pans. I plunked the waffle iron on the counter with a self-satisfied feeling of achievement. There! It felt good. I felt the boulder of my inertia slowly starting to roll downhill. I thought, why not try a different waffle recipe? Why not seize the day, accomplish something in life? I had already gotten the waffle iron out. What could be harder than that?

So I turned to my favorite mother-daughter team, the Rombauer ladies, to see what they had to say about waffles. It turns out quite a bit. You don't write a book containing more than 4,300 recipes by being taciturn. (I'm talking about my 1964 edition of The Joy of Cooking.) In addition to several creative serving suggestions, including illustrated instructions for cooking strips of bacon directly into your waffle, I learned that the more fat you add to your waffle batter, the crispier your waffles will be. I never knew that! Then, I hit this: "We also suggest beating egg whites separately for a superbly light waffle."
Internal groan. Oh crap, do I have to? I already got out the waffle iron. Isn't that enough? Can't I just mix the eggs in whole?
Then I thought about Ms. Rombauer, and how her husband committed suicide by shooting himself through the mouth with a shotgun, and needing a source of income, she, a complete amateur, decided to write what turned out to be one of the most ubiquitous, and used, cookbooks in America. (She self-published the first edition. I like to think of her as a proto-blogger.)
No. You are going to separate those eggs, if it's the Last. Thing. You. Do. So I did it. I let the mucousy whites slip through my fingers into a bowl, and I deposited the velvety yolks into another bowl. I beat those egg whites until my arm hurt, and then beat them some more until my arm was numb. Then I gently folded the white foam into the batter, just like Ms. Rombauer told me to.
And? She was right. My waffles turned out superbly light. In fact, they turned out so superbly light that I'm going to have to make my waffles like that every time from now on. There's no going back, sore arm be damned.
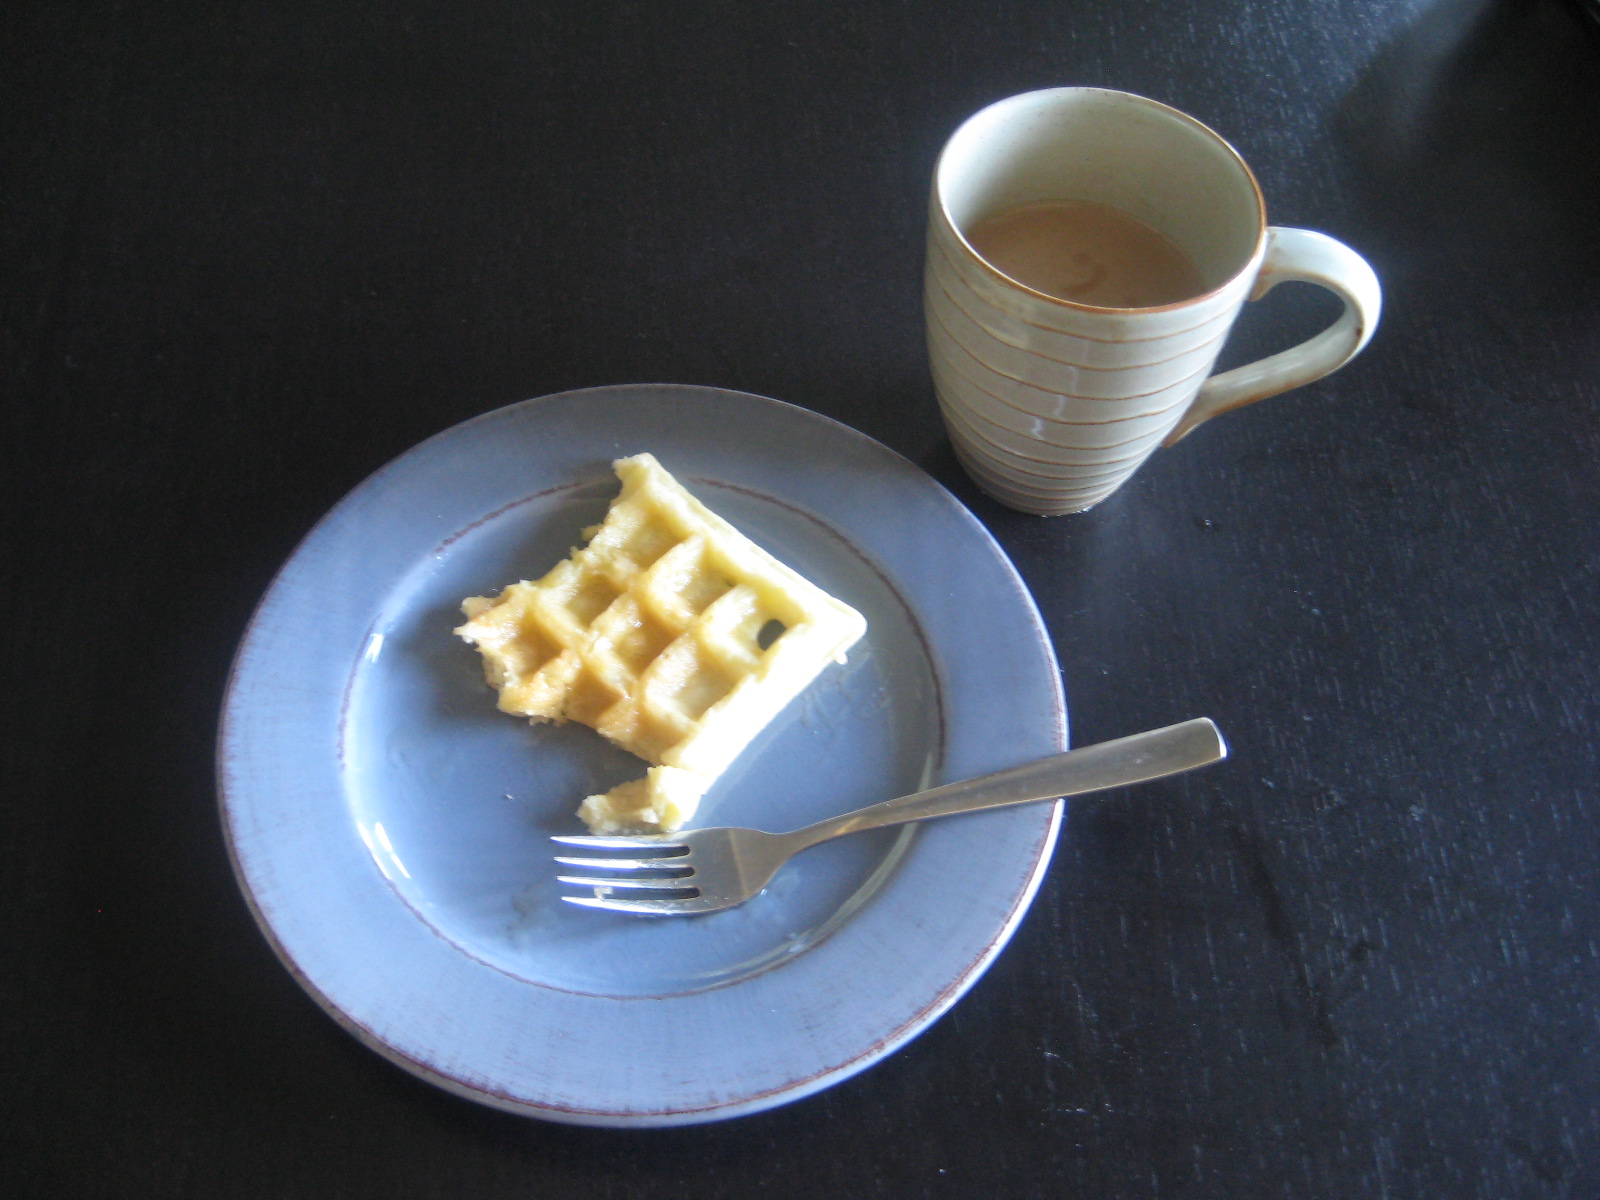
(A little tip: Put your leftover waffles in the fridge or freezer, and then warm them up in the toaster when you are ready to eat them. Just like store bought! But way tastier, as long as you don't burn them.)
Superbly Light Waffles
Adapted from The Joy of Cooking (1964 edition)
1¾ cups all-purpose flour
2 teaspoons baking powder
½ teaspoon salt
1 tablespoon sugar
3 egg yolks
3 tablespoons canola oil
1½ cups milk
3 egg whites
Start heating your waffle iron. Add the flour, baking powder, salt, and sugar to a large mixing bowl and mix well. Separate three eggs, then beat the yolks. Make a well in the middle of the dry ingredients, and add the yolks, oil, and milk. Stir until just combined and moistened. Do not over-mix. Using a wire whisk, beat the egg whites until they are all foamy. Fold the egg whites very gently into the batter. Scoop ladlefuls of batter onto your waffle iron and make the waffles according to your waffle iron's instructions. (On mine, the little green light which signals the waffle is done is broken. I can tell the waffle is done when no more steam is coming out.) Serve with butter and maple syrup or honey. And a badly needed cup of coffee.
Subscribe to:
Posts (Atom)

 Posts
Posts


